This guide was written so that if anyone can read, they can setup a PC98 HD. My thanks goes to Unipuma for translating the options in the menu for me as I cannot read them myself and this guide would not exist without his help.
I appologize for all the pictures in advance, and even though some of them may not seem needed to you, I have to make this as fool proof as possible.
PART 1: Creating a HD Image using ANEX86
You need the following files to do this:
ANEX86 (Which you should already have)
A MS-DOS 6.2 Floppy Image for PC98 (Available from most PC98 pages)
And the System Font .BMP file which Unipuma's Cowabunga98 provides and explains how to setup.
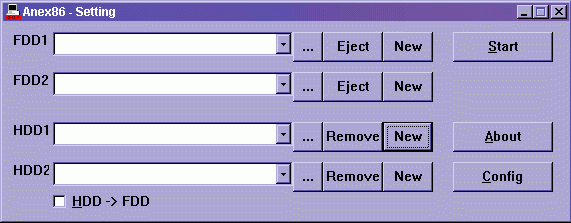
First load up ANEX86:
Click on the NEW button on the HDD1 area (It's got a dotted box around it in the picture)
The ANEX86 HD Creation window will pop up:
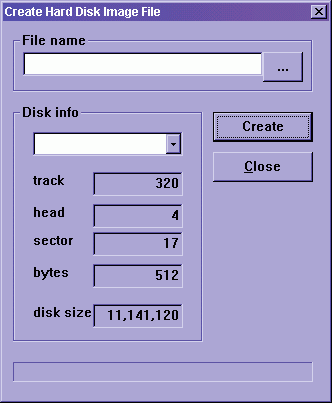
Type in a name for the HDD in filename and then select the size in the pulldown menu on Disk Info and select Create, when it finishes, select Close.. Click the "..." on FDD1 and select the MSDOS system disk. It should look like this when you're done:
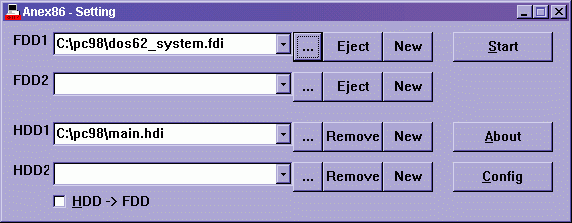
(Main.hdi is the name of my HD.. you should see whatever you decided to call it right there)
Click on Start and let it boot up, it will bring you to a program.. Hit ESC and this will pop up:
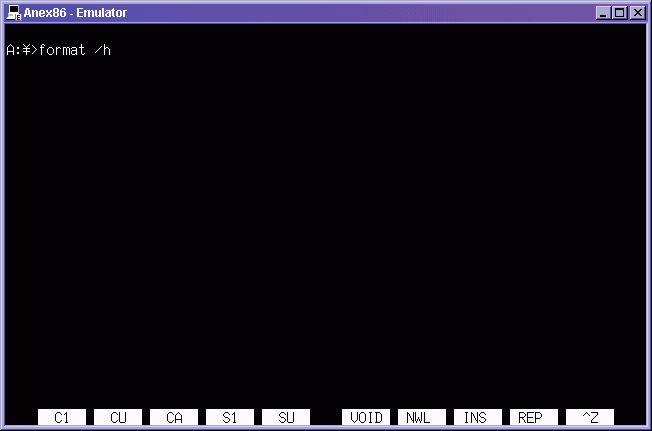
Hit enter again and you will be dropped to the MS-DOS prompt.. Type in format /h and hit enter:
PART 2: Formatting your HD
Welcome to NEC's FORMAT program!
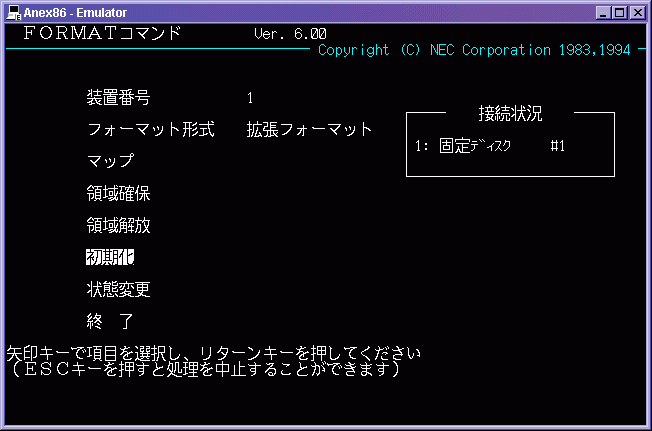
Already the Format HD command is highlighted (It's all in japanese so pay attention to how to navigate). Hit enter TWICE:

It is now formatting your HD image you just created when it finishes hit any key to return to the main menu:
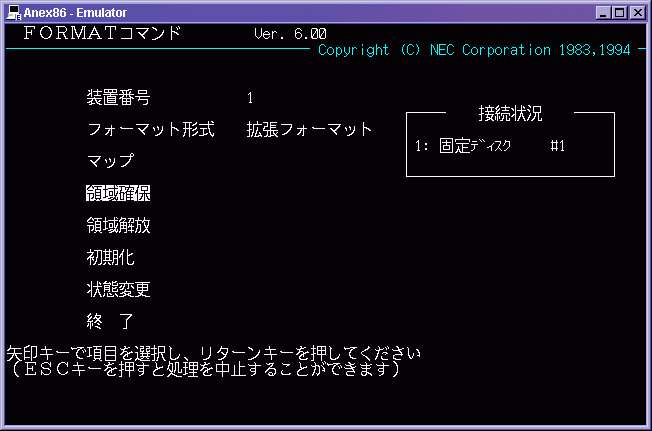
Highlight the Command shown in the above picture using the arrow keys and hit enter.. It's time to setup the DOS Partition!
PART 3: Setting up the DOS Partition
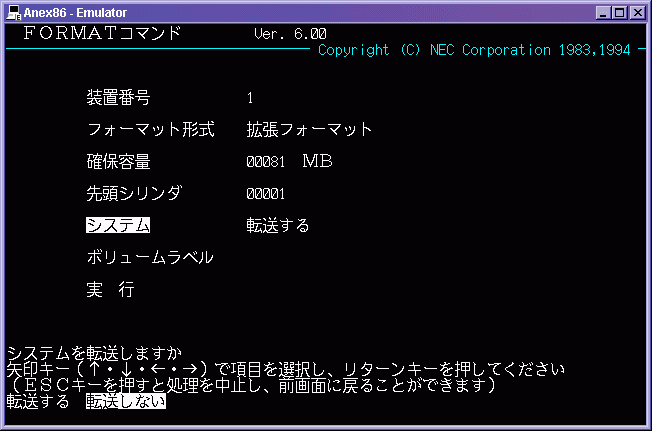
Move down to where its highlighted and the bottom part will show two choices, use the left and right keys and highlight the SECOND choice and hit enter.. It's VERY important you do this (really!!!). Now move down one again:
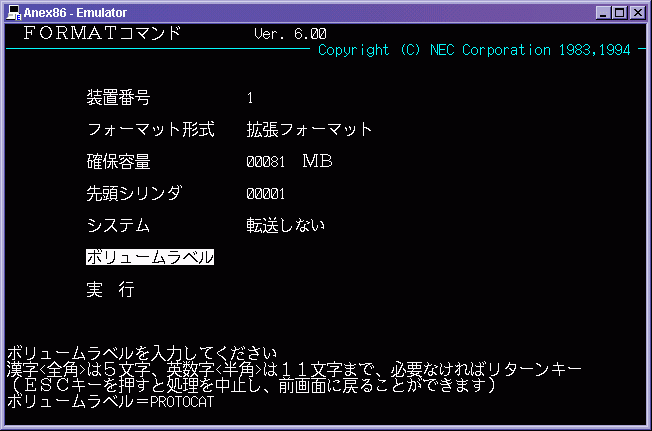
Type in a HD Label (I am using Protocat in this example) and hit enter.. Then go down to the final option.. A new choice will appear:
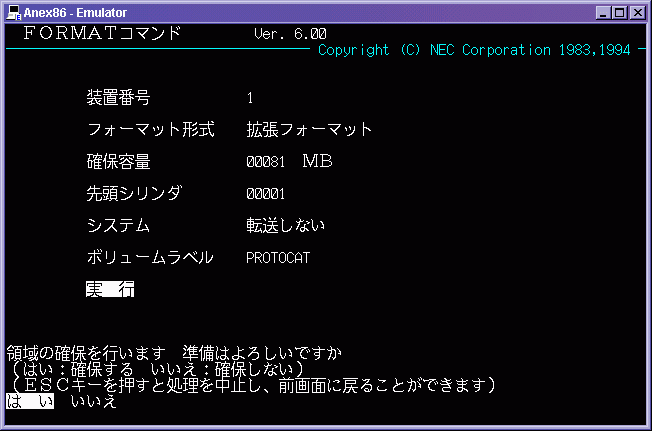
Hit enter and it will have a new progress indicator. Once thats finished hit any key to return to the main menu:
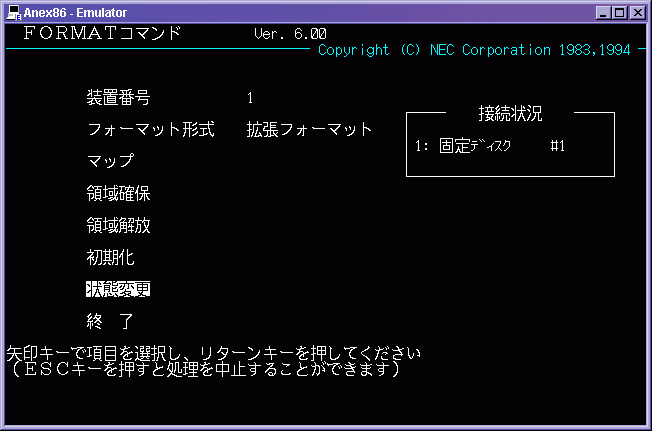
Highlight this option and hit enter.
PART 3: Final Settings to the HD
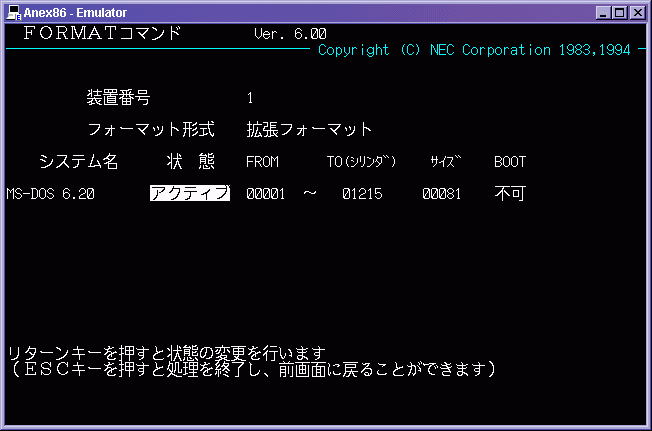
From this screen above, left and then type in a name if you wish and hit enter.. I chose "Hentai OS" to replace the name MS-DOS 6.20. You don't have to if you don't want to.. I just did to be silly. Anyway highlight the last option:
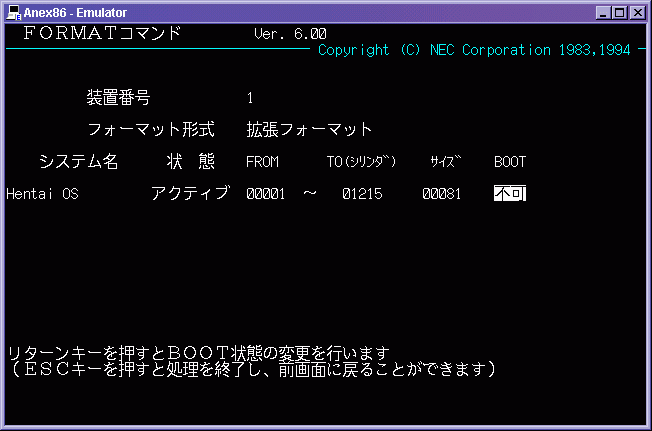
Hit enter once, it will toggle to this:
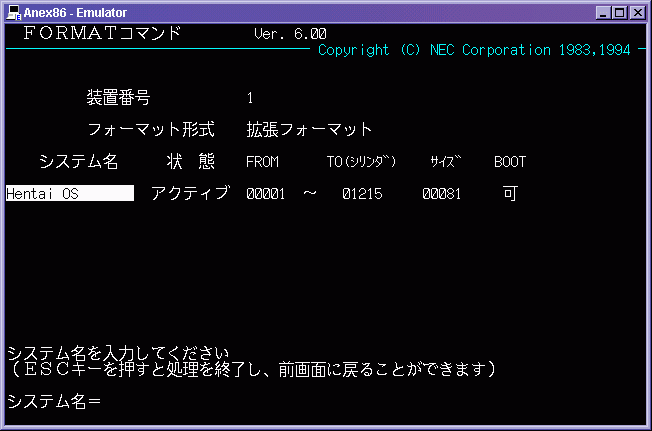
Hit escape now and you're in the main menu again, Go down to the last option and hit enter TWICE.. This will exit you from the program.. Now click the close button on the window and then hit start again on the ANEX Setup.. This is rebooting the machine so it will detect your new formatted HD.. You are almost done.. Now quit back to the dos prompt like you learned in the beginning of Part 2. Type this in sys a: c: and then hit enter:
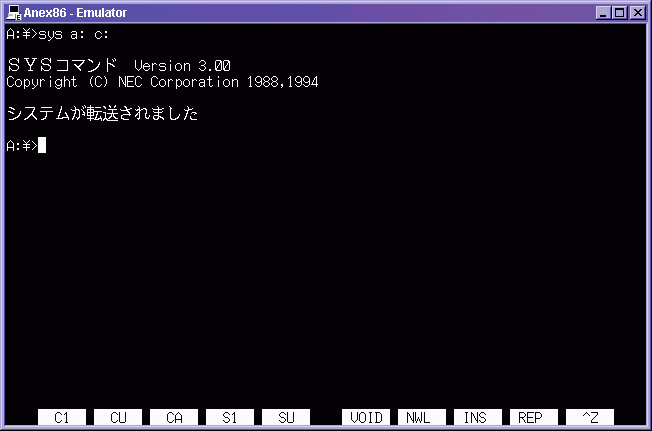
You're done! You have a complete setup HD for use with ANEX86.. How to use the HD with games and such is outside the focus of this document.